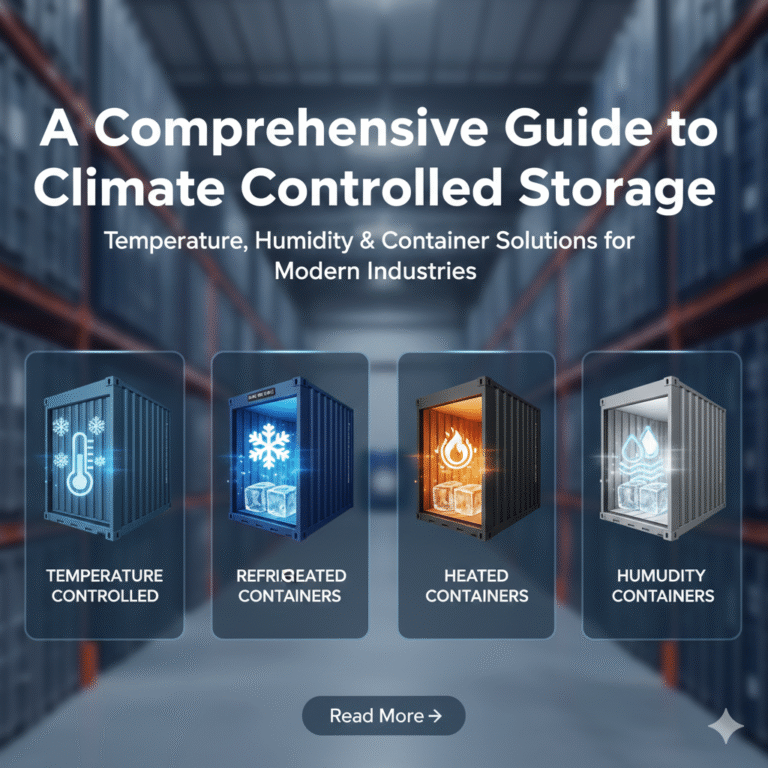
Brewing Equipment Checklist for Opening a Craft Brewery (From Brewhouse to Packaging)
Opening a craft brewery is exciting—and expensive. The fastest way to blow your budget (and your timeline) is to buy equipment in the wrong order, under-size critical utilities, or forget “small” items that turn into big delays. A practical checklist helps you plan capacity, avoid rework, and build a system that can grow.
This guide walks you through a complete brewing equipment checklist for launching a craft brewery, from core brewhouse hardware to cellar tanks, utilities, packaging, quality control, and safety. Use it as a planning framework whether you’re building a nano brewery, a brewpub, or a production-focused microbrewery.
1) Start With Your Production Plan (Before You Buy Anything)
Before you start selecting equipment, define three numbers:
- Batch size (BBL or HL): Common craft sizes include 3BBL, 5BBL, 7BBL, 10BBL, 15BBL, and 20BBL.
- Annual production target: Your tank count, cellar layout, and packaging plan depend on it.
- Beer mix: How many core beers vs seasonals? Any lagers, sours, high-gravity beers, or hazy IPAs? Different styles drive tank residency time and process needs.
A 10BBL brewhouse can produce very different yearly output depending on tank capacity, fermentation duration, and how often you package. Get these assumptions right and everything downstream becomes easier.
2) Brewhouse Equipment Checklist (The Heart of Your Brewery)
Your brewhouse is where mash, lautering, boiling, whirlpooling, and hot-side transfers happen. A clean, efficient brewhouse shortens brew days and improves consistency.
Brewhouse essentials
- Mash/Lauter Tun (MLT)
Key considerations: false bottom design, rakes (for larger systems), manway access, insulation, and CIP capability. - Brew Kettle (Boil Kettle)
Look for proper steam/electric heating capacity, insulation, a strong whirlpool inlet, and a condensate stack or steam condenser options depending on local code. - Whirlpool function (sometimes integrated with the kettle)
Ensure whirlpool geometry supports good trub cone formation and clean wort. - Hot Liquor Tank (HLT)
For strike and sparge water. Under-sizing the HLT is a common mistake that slows production. - Cold Liquor Tank (CLT) (optional but very common for production systems)
Helps with cooling operations and consistent brew day flow. - Wort Heat Exchanger (plate heat exchanger most common)
Size it for your batch volume and groundwater temperature. Consider a two-stage setup (water + glycol) if needed. - Wort Aeration/Oxygenation assembly
Inline oxygen stone, regulator, and sanitary connections. - Hop dosing options
Hop back, hop doser, or dosing port for kettle additions depending on your recipe approach. - Brewhouse pump(s)
Sanitary centrifugal pumps sized for your flow rates; often at least two pumps for smooth operations. - Brewhouse piping, valves, and fittings
Sanitary butterfly valves, tri-clamp fittings, sample valves, and proper slope for drainage. - Brew deck / platform
Safety rails, non-slip surfaces, and ergonomic access.
Nice-to-haves (often worth it)
- Grain hydrator / mash-in device to reduce clumping and improve lauter efficiency
- Flow meters and temperature sensors for repeatability
- Automation controls (semi-auto or full-auto) to reduce labor and improve consistency
Don’t skip: A realistic electrical/steam plan. Many breweries redesign utilities after equipment arrives—costly and slow.
3) Grain Handling & Milling Checklist
Your grain system impacts extract efficiency, consistency, dust control, and labor. Even small breweries benefit from a clean, safe milling setup.
Essentials
- Grain mill (two-roller or four-roller depending on scale)
- Grist case / hopper (especially for larger systems)
- Auger or flex conveyor to move milled grain
- Spent grain handling (bins, tote system, or auger to dumpster)
- Dust collection / explosion safety (highly recommended; sometimes required)
- Scale system for grain and hop measurement
- Storage (grain pallets, sealed bins, or silo for higher volume)
Tip: Underestimating dust management can create safety issues and cleanliness headaches. Plan for easy cleanup from day one.
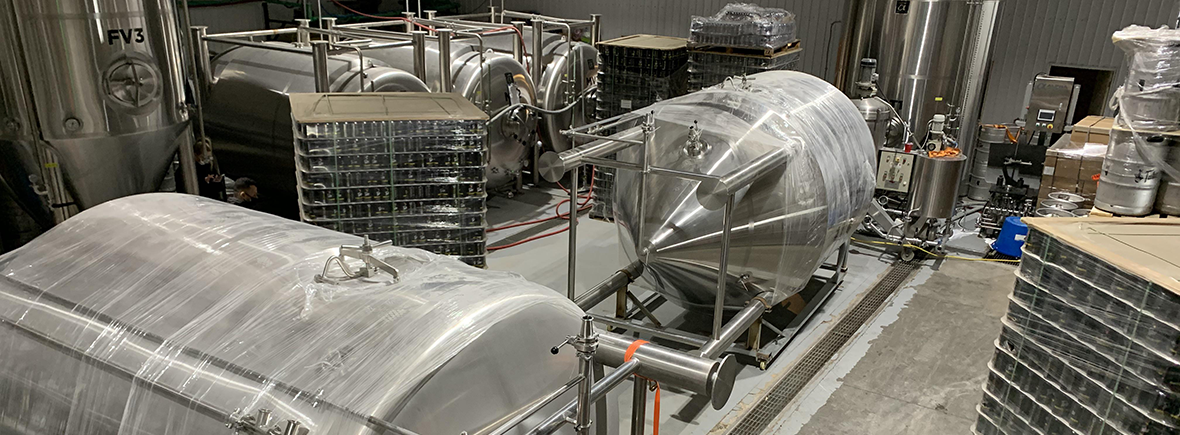
4) Cellar (Fermentation & Conditioning) Checklist
The cellar is where your beer becomes beer. Most breweries discover too late that tank capacity—not brewhouse size—is the true limiter of production.
Fermentation essentials
- Fermentation tanks (FV/Unitanks)
Decide between dedicated fermenters and unitanks. Unitanks can ferment and carbonate, simplifying equipment needs. - Brite tank(s) (if not using unitanks for finishing)
For carbonation, clarification, and packaging. - Yeast brink / yeast management (optional but powerful)
Helps with yeast harvesting, storage, and consistent pitching. - Glycol jackets on tanks
Ensure jacket design supports strong cooling performance and stable fermentation temperature.
Cellar hardware & accessories
- Glycol piping and insulation
Proper line sizing and insulation prevent energy waste and temperature instability. - Inline carbonation stone (if force carbing)
- Tank sample valves
- Tank CIP spray balls
- Pressure relief valves (PRV) and vacuum relief
- Manways, racking arms, and sight glasses
- Spunding valves (for natural carbonation / pressure fermentation)
Common pitfall: Not enough brite capacity. If you plan to can or keg regularly, brite tanks are bottlenecks.
5) Cold-Side Utilities Checklist (Glycol, CO₂, Air, Water)
Utilities are “invisible equipment” that determine whether your brewery runs smoothly or constantly breaks rhythm.
Glycol cooling system
- Glycol chiller sized for:
- fermentation heat load
- crash cooling needs
- ambient temperature
- future expansion
- Glycol reservoir and pumps
- Glycol distribution manifold
- Insulated glycol lines
- Temperature control valves and probes
CO₂ system
- Bulk CO₂ tank or cylinder bank (depending on scale)
- CO₂ regulators, manifold, and safety chain/storage
- CO₂ monitoring alarms (highly recommended; often required)
Compressed air
- Oil-free air compressor (preferably)
- Air dryer and filtration
- Air lines to packaging and valves (if needed)
Water system
- Water filtration (sediment + carbon)
- Water testing and treatment plan (salts, pH adjustment)
- Hot water distribution for cleaning
- Hoses, reels, and proper drains
Tip: A well-designed drain plan is as important as tanks. Bad drainage causes daily frustration.
6) Cleaning & Sanitation Checklist (CIP / COP)
Cleaning is a production process. Efficient cleaning reduces labor and improves beer quality.
Essentials
- CIP cart or built-in CIP system (scale-dependent)
- Caustic tank / acid tank (or dedicated totes)
- Sanitizer dosing tools
- Hoses, spray nozzles, and quick-connects
- Parts washer / COP tank (Clean Out of Place for fittings, gaskets, small parts)
- Chemical storage cabinet and spill containment
- PPE: gloves, apron, goggles/face shield
Process tools
- ATP swabs (optional) and cleaning verification methods
- Standard cleaning SOPs posted and trained
Common pitfall: Underbuying hoses, clamps, and small fittings. These “minor” items can halt a brew day.
7) Packaging Equipment Checklist (Kegging, Canning, Bottling)
Choose packaging based on your go-to-market plan. Many breweries start with kegs and add canning later—but you should still plan space and utilities upfront.
Kegging essentials
- Keg washer (manual or semi-auto)
- Keg couplers, keg tools, and replacement parts
- Keg storage racks and cold storage space
- Keg filler / manifold
- Keg tracking system (even a simple barcode + spreadsheet)
Canning line (if canning from launch)
- Can rinser / twist rinse
- Filler/seamer (manual, semi-auto, or automated)
- DO (dissolved oxygen) control strategy (critical for shelf life)
- Date coder
- Conveyor / accumulation table
- Can dryer (optional but helpful)
- Pack-off table and case packing
Bottling (less common for new small breweries)
- Bottle rinser
- Filler (counter pressure preferred for quality)
- Capper/crowner
- Labeler (if using labels)
- Pasteurization (rare for small craft; depends on product goals)
Tip: If you’re not ready for a full line, consider a mobile canning partner at first—then build your own line once volume is predictable.
8) Quality Control (QC) & Lab Checklist
Quality control prevents costly dump batches and protects your brand. You don’t need a huge lab to start, but you do need a minimum toolkit.
Starter QC kit
- pH meter (brew day + fermentation)
- Hydrometer and/or refractometer
- Accurate thermometer(s)
- Dissolved oxygen (DO) meter (optional early, but valuable if packaging)
- Microscope (for yeast viability and cell counts)
- Hemocytometer and stains (methylene blue or equivalent)
- Sanitary sampling tools
- Plating supplies (optional) or partnership with a local lab
Sensory program basics
- Tasting panels (structured, consistent)
- Flavor reference kits (optional)
- Recordkeeping: batch logs, fermentation profiles, sensory notes
9) Safety, Compliance & Facility Checklist (Don’t Ignore This)
Some of the most expensive surprises come from safety and compliance requirements.
Safety essentials
- Eyewash station near chemicals
- Chemical labeling and SDS binder
- Non-slip mats and floor markings
- CO₂ monitors in production/cold storage areas
- First aid kit and training
- Confined space and pressure safety training (as applicable)
Compliance-related equipment considerations
- Pressure-rated tanks and proper relief valves
- Electrical panels compliant with local code
- Ventilation for steam and chemicals
- Backflow prevention for water lines
- Wastewater management (pH, solids, local discharge rules)
10) “Small Stuff” Checklist That Saves Your Brew Days
These items are easy to forget and end up causing delays:
- Extra gaskets, tri-clamps, and valve seals
- Spare pump seals and impellers
- Spare PRV and pressure gauges
- Hose clamps, hose gaskets, and adapter fittings
- Sample bottles, lab labels, and log sheets
- Work tables, shelves, and tool storage
- Forklift/pallet jack and compatible pallets
- Temperature probes and calibration tools
How to Use This Checklist (A Simple Buying Order)
If you’re building from scratch, this purchase order usually prevents rework:
- Plan production & layout (tank count drives everything)
- Utilities & drainage plan (glycol, steam/electric, water, drains)
- Core brewhouse
- Fermentation & brite tanks
- CIP + cleaning systems
- Cold storage
- Packaging
- QC lab
- Extras & spares
Final Recommendation: Consider Micet for Your Brewery Build
When you’re ready to source equipment, working with a manufacturer that can provide turnkey brewery systems, custom tank fabrication, and project support can reduce coordination headaches—especially if you’re opening on a deadline.
If you’re comparing suppliers, Micet is worth considering for:
- Complete brewhouse systems (from nano to larger production scales)
- Fermentation tanks, unitanks, and brite tanks
- Utilities integration support (glycol solutions and system matching)
- Turnkey project experience and customization options
If you want a smoother launch, ask Micet for a proposal based on your target batch size, expected annual volume, beer styles, and packaging plan—then map the quote against this checklist to confirm you’re not missing anything critical.Taba Squishy
FAQs
1) What size brewhouse is best for a first craft brewery?
It depends on your sales plan, but many new breweries start with 5BBL to 10BBL for a balance of cost, flexibility, and output. The bigger factor is often fermentation capacity—enough tanks to keep beer moving without creating bottlenecks.
2) What equipment do breweries most commonly forget to budget for?
Utilities and “small parts” are the biggest misses: glycol system sizing, drainage, CO₂ safety, plus ongoing needs like hoses, clamps, gaskets, spare pump seals, and cleaning gear. These aren’t glamorous, but they keep your brewery running.
3) Should I start with canning equipment or add it later?
If most of your early sales will be taproom and local draft, many breweries start with kegs first and add canning once demand is stable. If your strategy depends on packaged distribution from day one, you should plan canning early—especially for space, power, air, and dissolved oxygen control.